In the last woodworking class, we learned sawing on day 1 and planing on day 2.
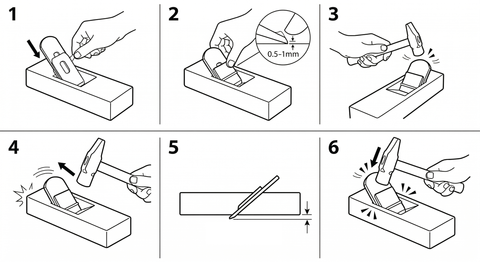
Today it’s time to learn the last of the three major hand tools: the chisel.
With a saw, a plane, and a chisel, we can make anything.

1. Your first joinery – finger joint and dovetail joint
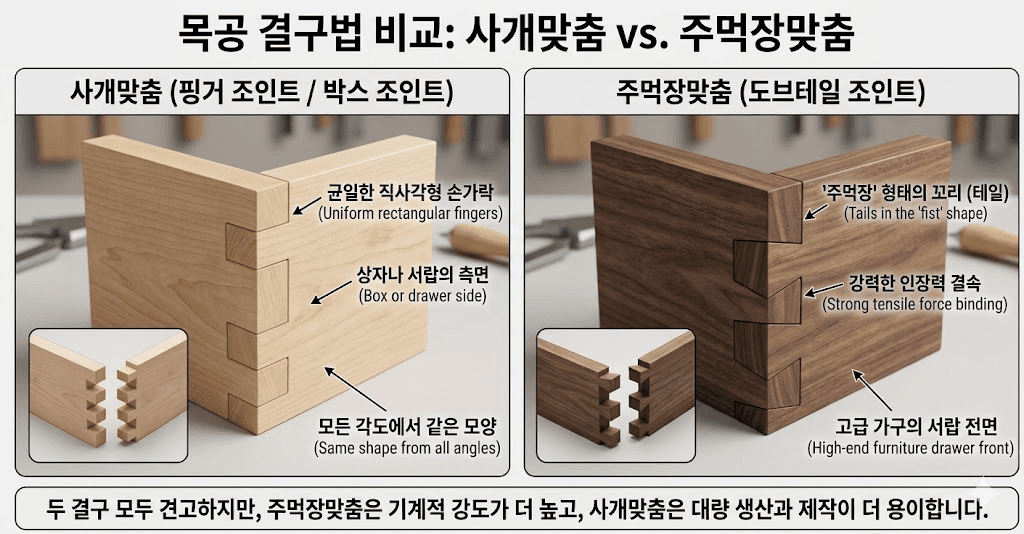
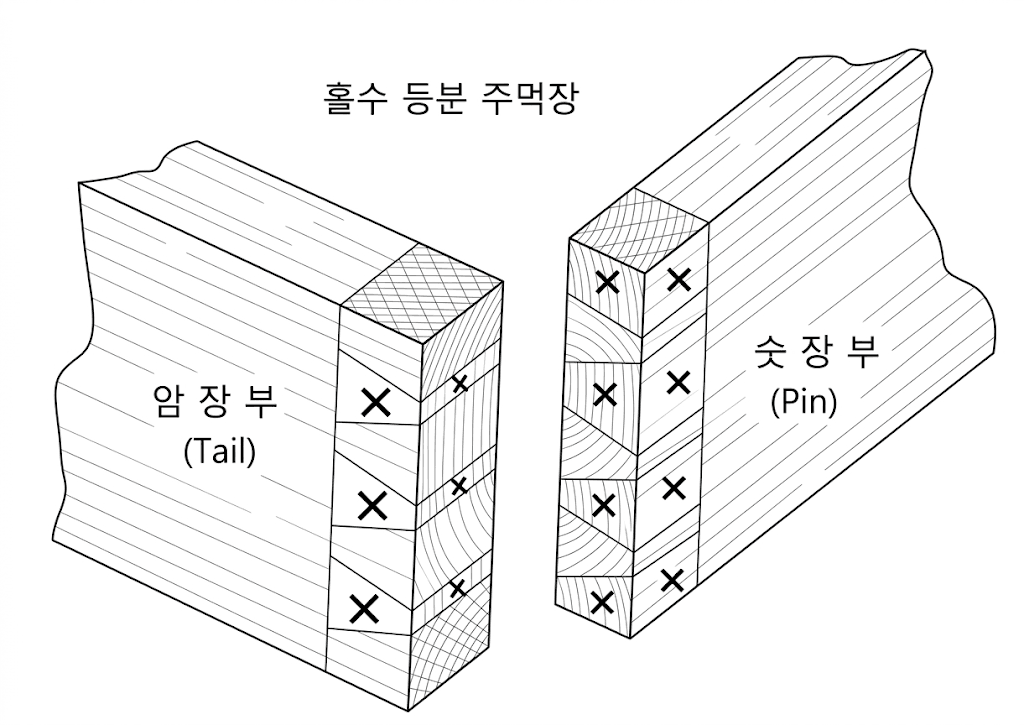
The first joinery joints you learn are the finger joint and the dovetail joint.
In a finger joint, the mating part is rectangular, and because the shapes are identical, it can be opened from any direction.
In a dovetail joint, the pieces are fitted together in a shape like a clenched fist, so you can only pull it apart in one opening direction.
The open joint isn’t that difficult, so we dove straight into making a dovetail joint.
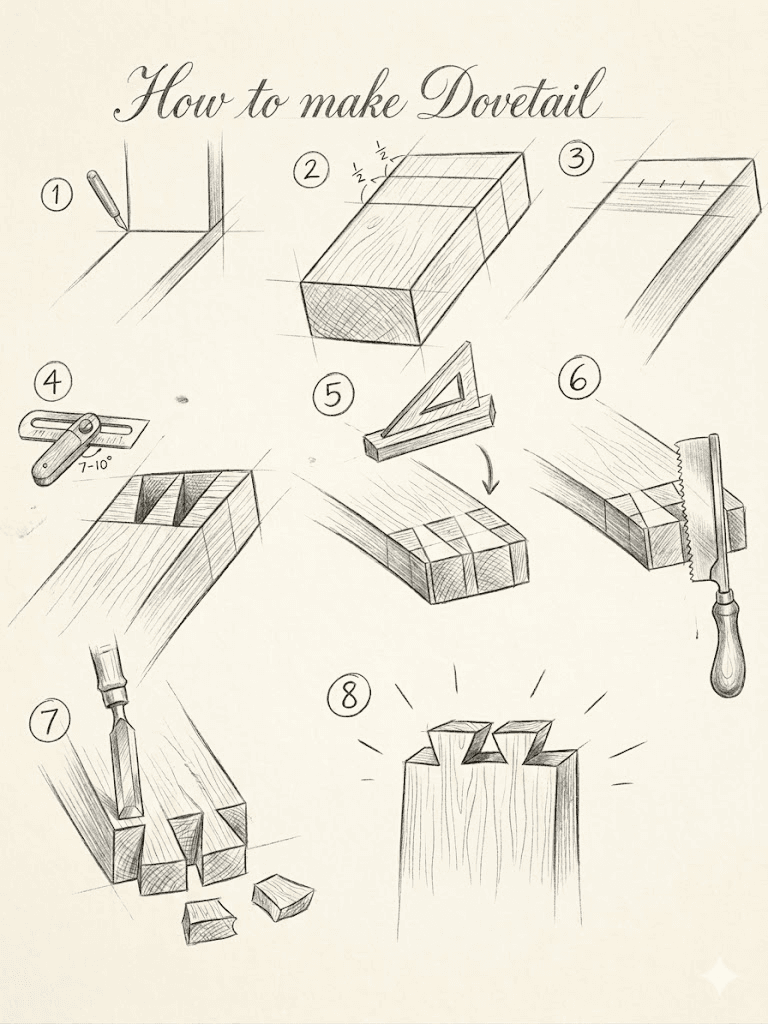
2. Steps for making a dovetail joint
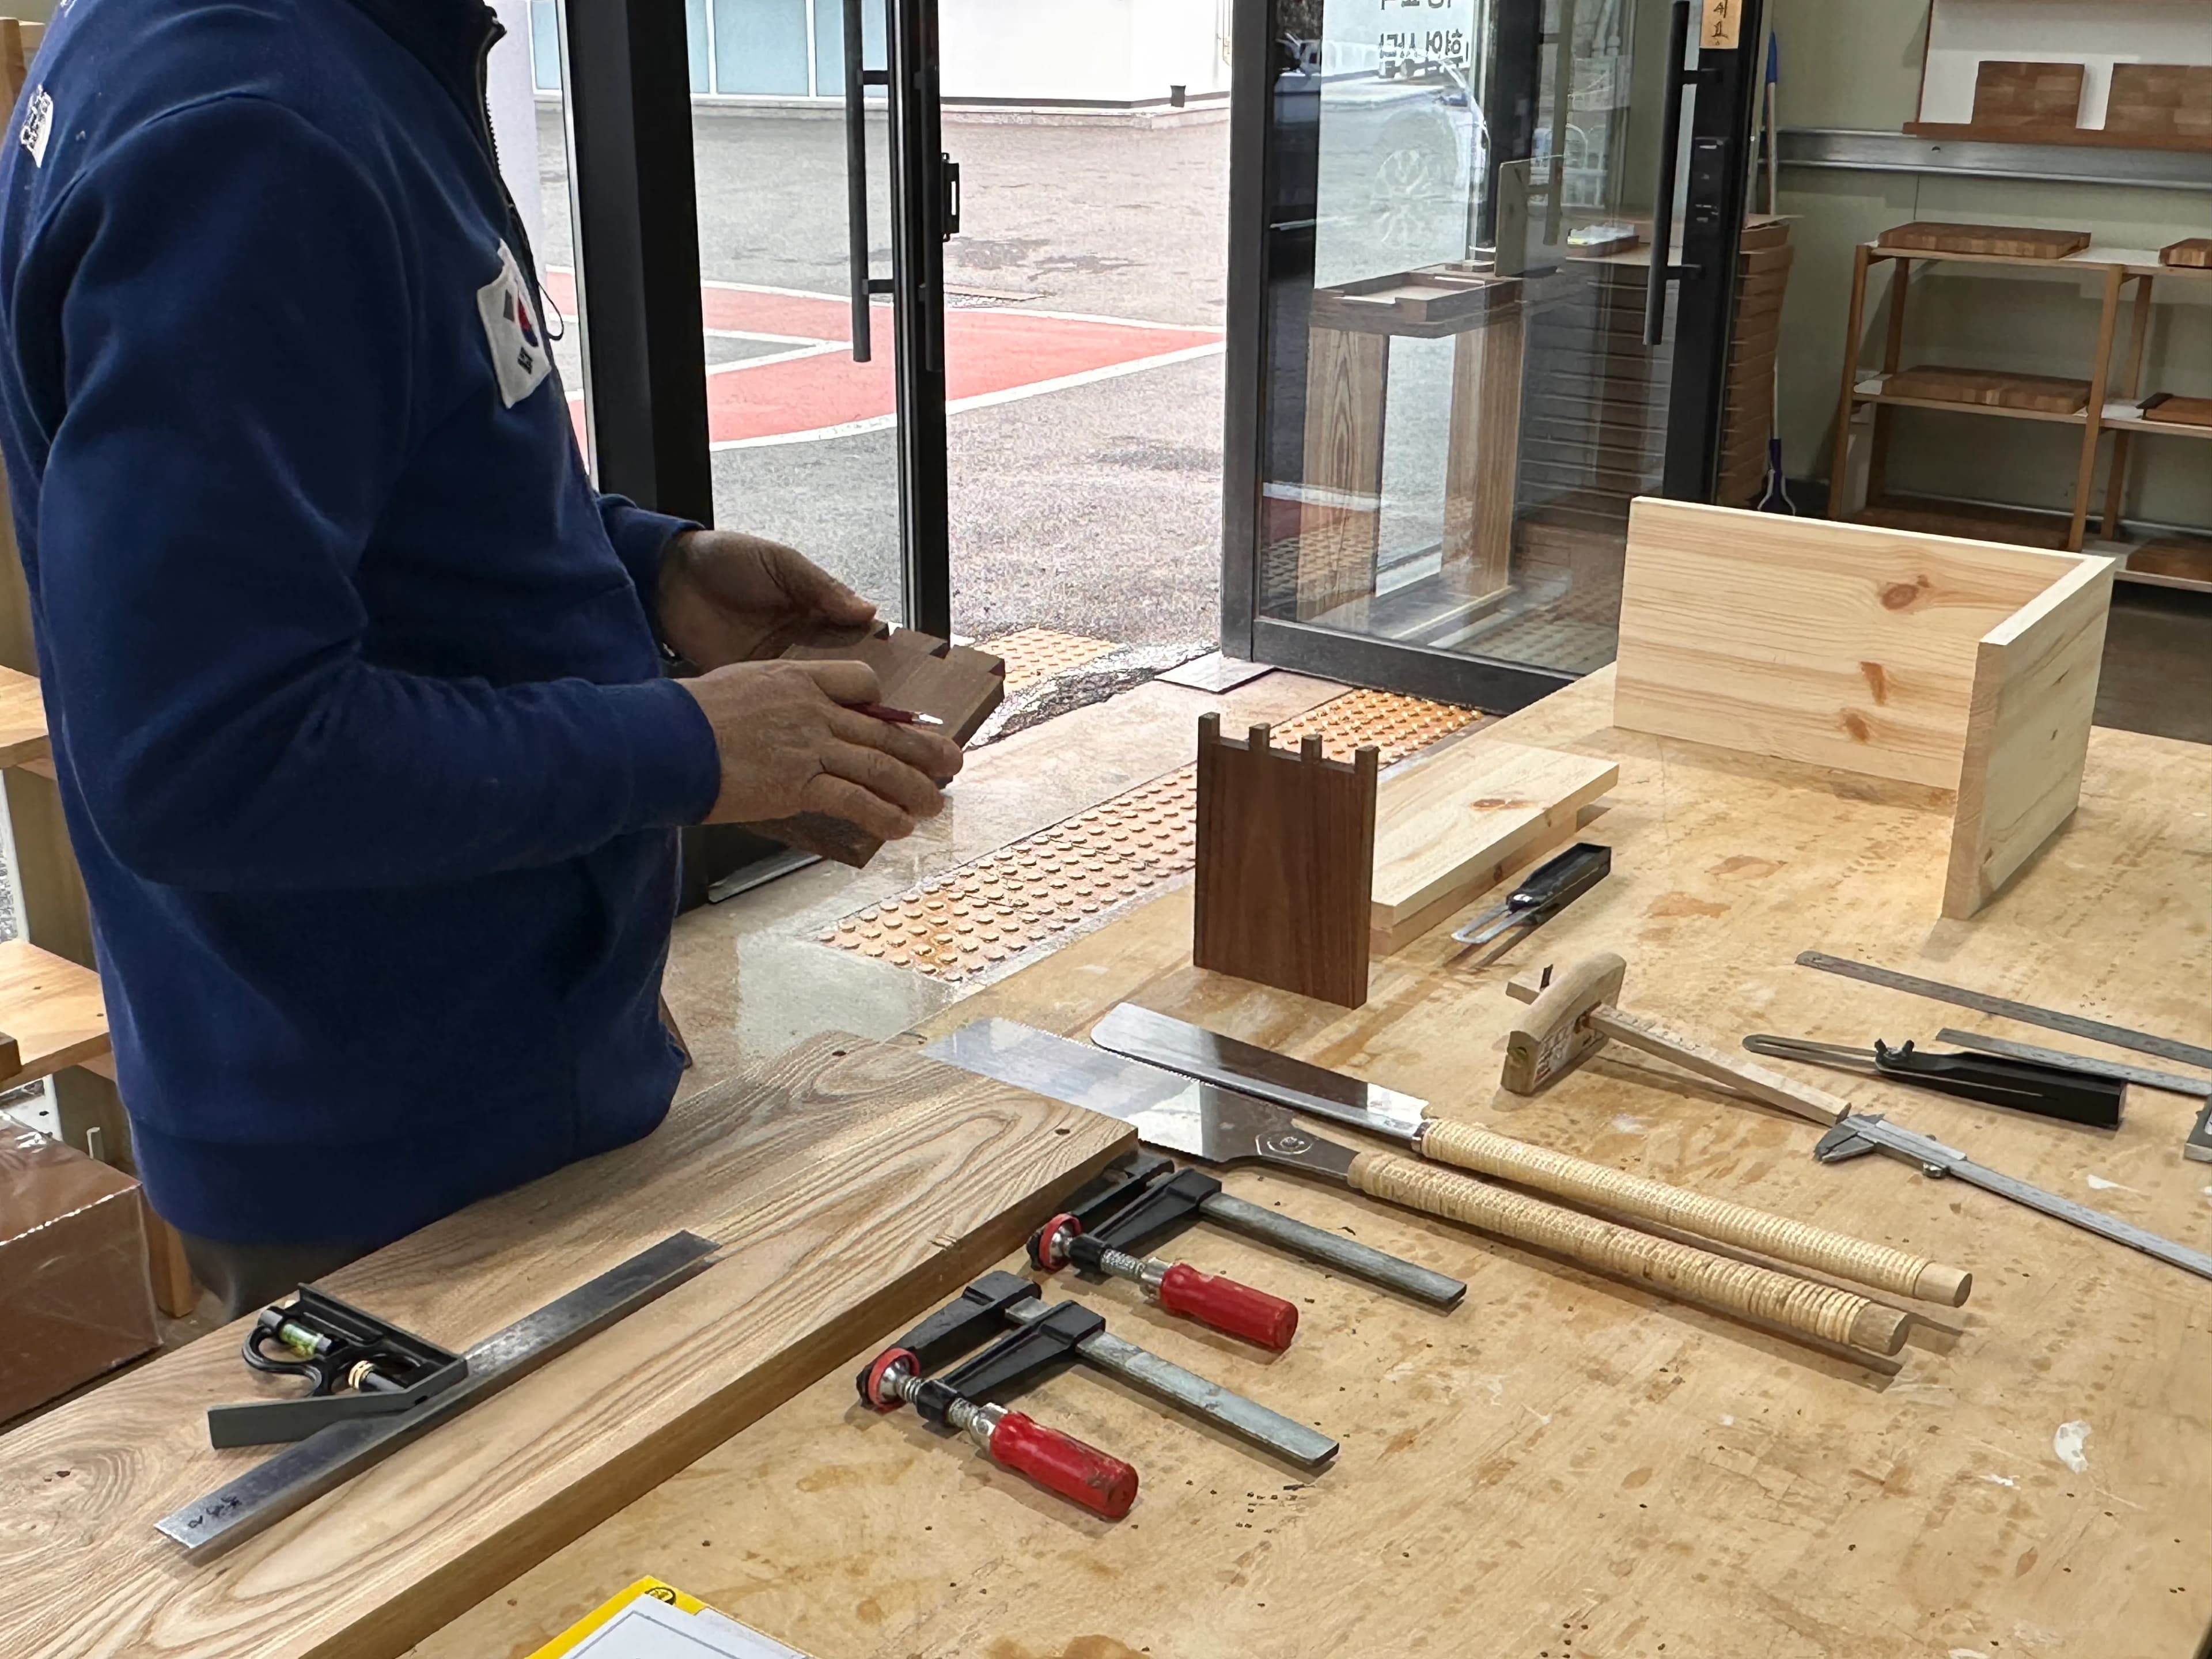
For dovetail joints, you usually make the male part first, then make the female part according to the shape of the finished male part.
This time when I went, we only made the male part, so I roughly sketched the steps for making the male part by hand.
I have no drawing skills, so I drew it roughly and asked Gemini to do the coloring.
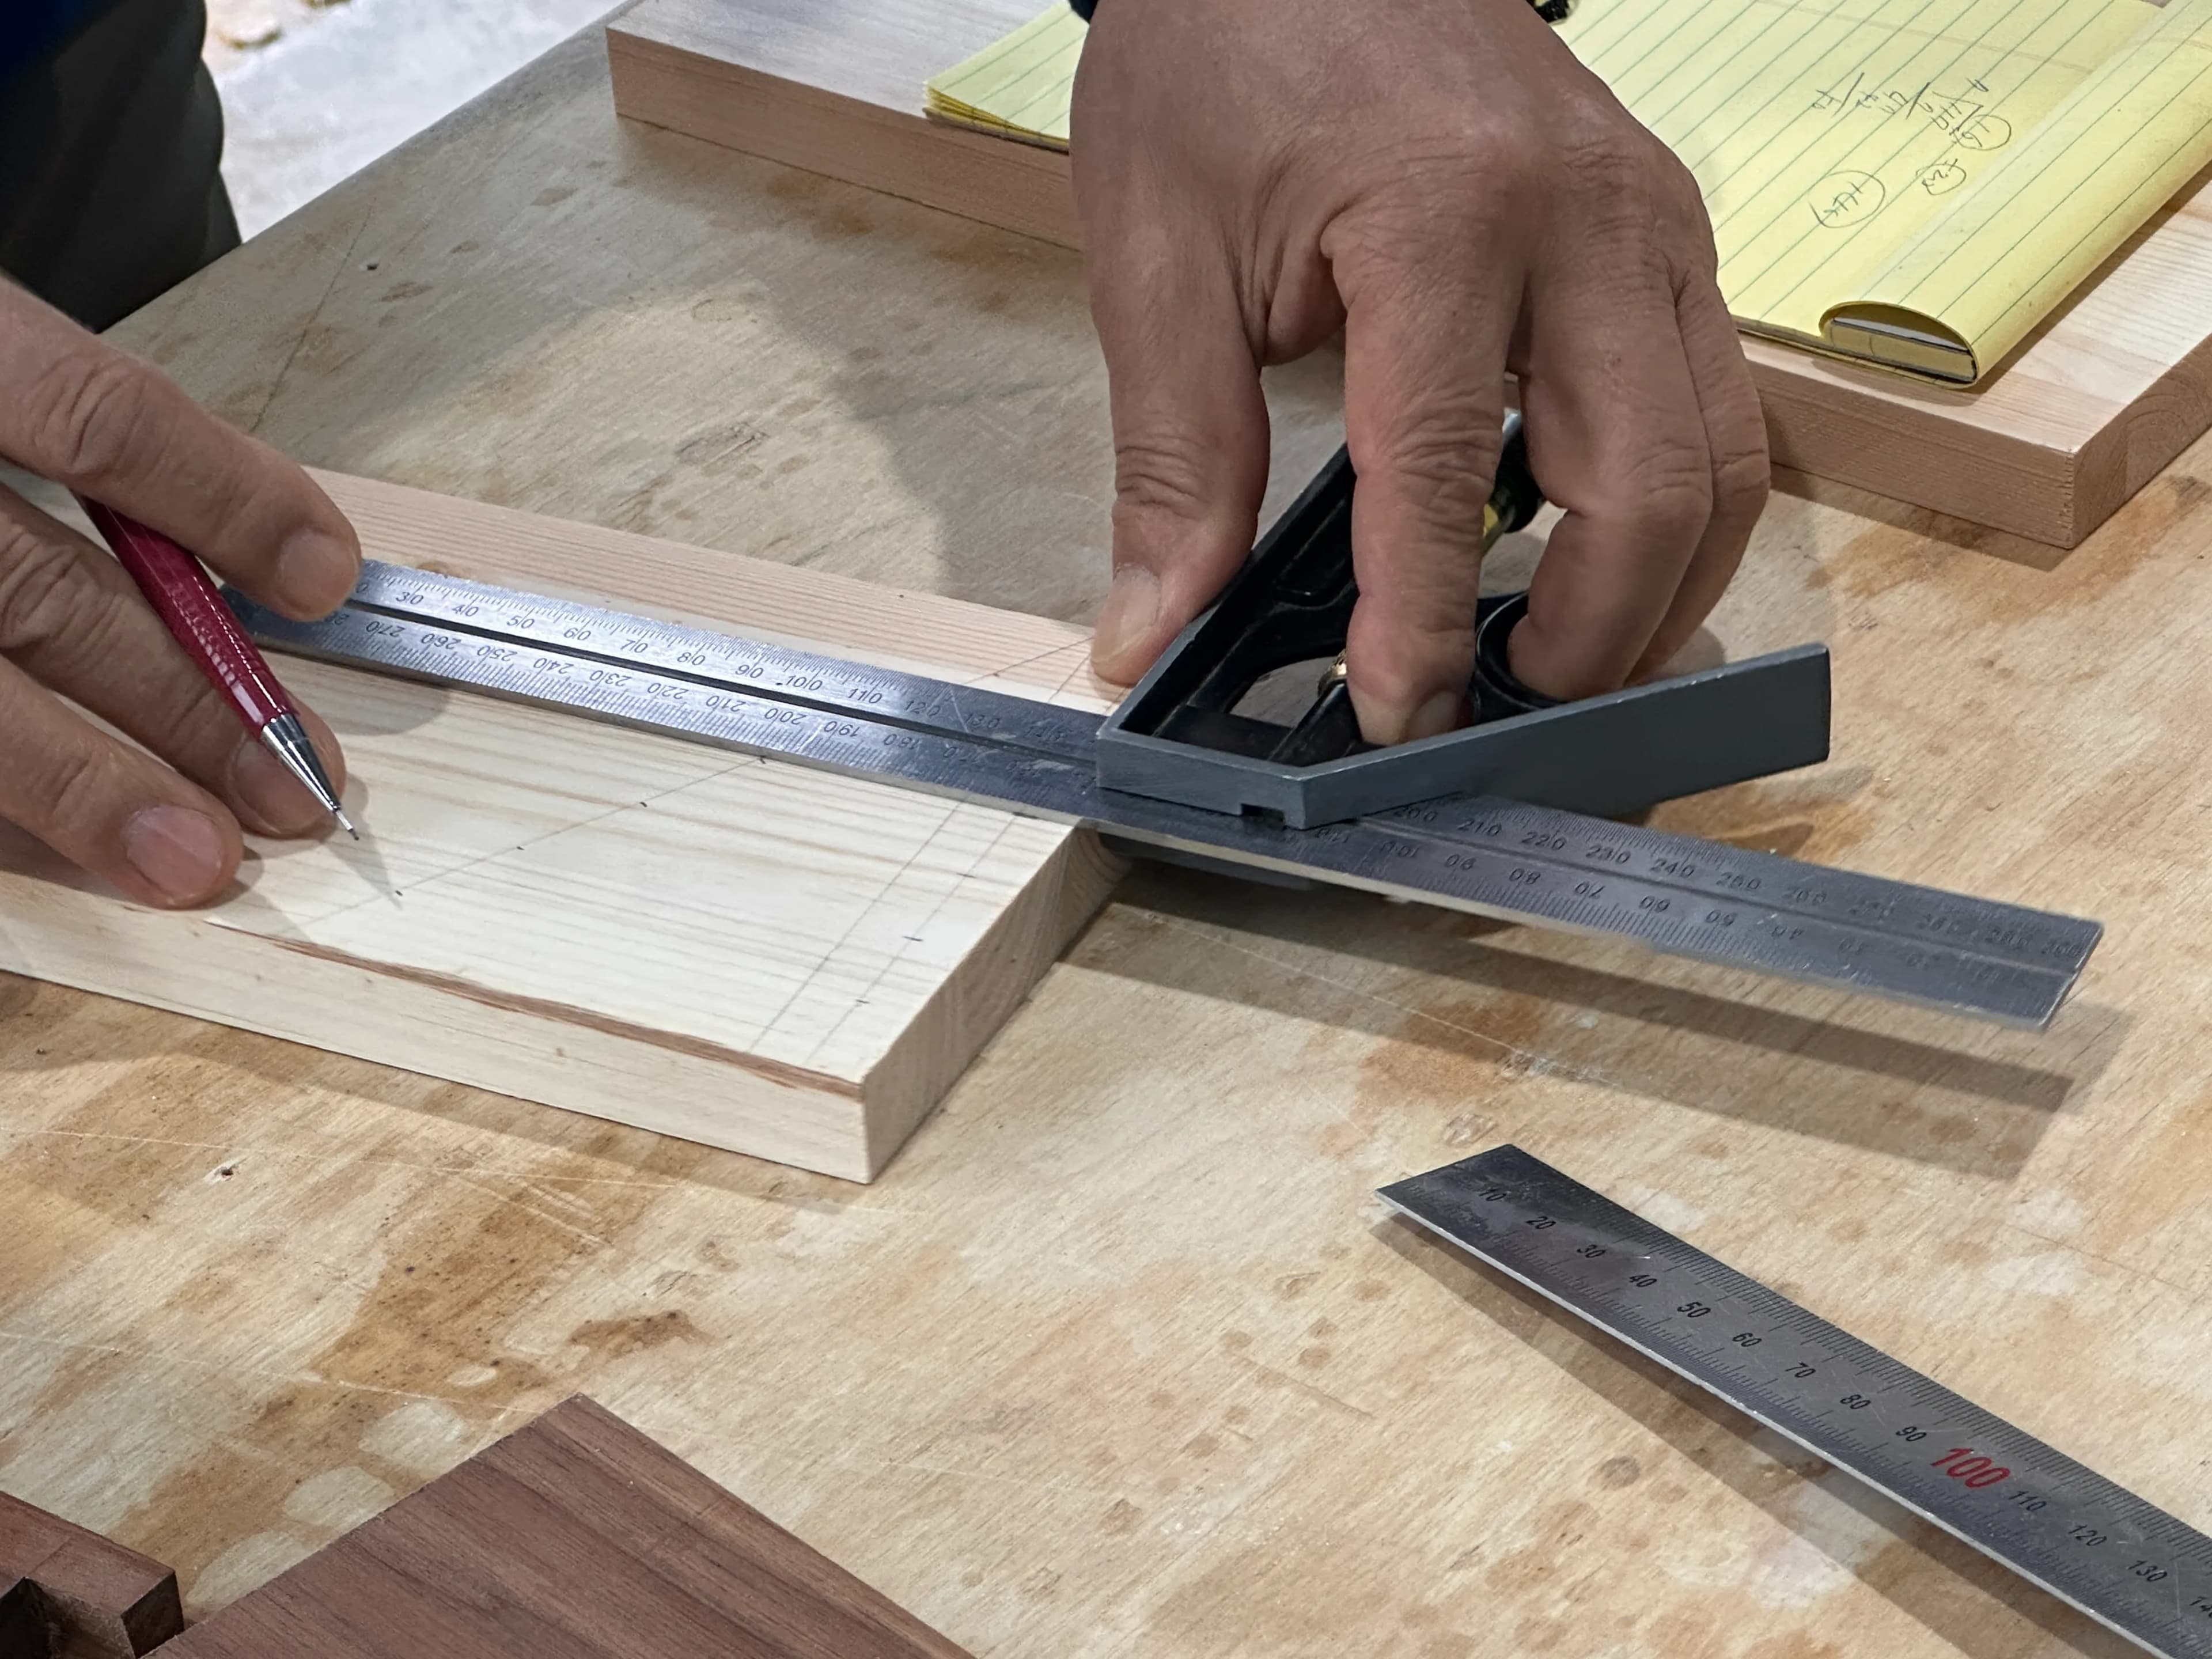
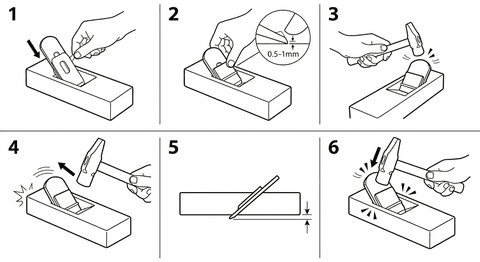
Place the two boards that you will dovetail together and draw a line corresponding to the thickness of the board.
Divide the line you drew in step 1 in half.
Divide the line from step 2 horizontally. Mark dots equal to the number of male tails you want to make * 2.
Use a sliding bevel to draw the lines. An angle of 7–10 degrees is considered standard.
Use a square to carry the lines from step 4 over to the back side. Be careful so the lines don’t get misaligned.
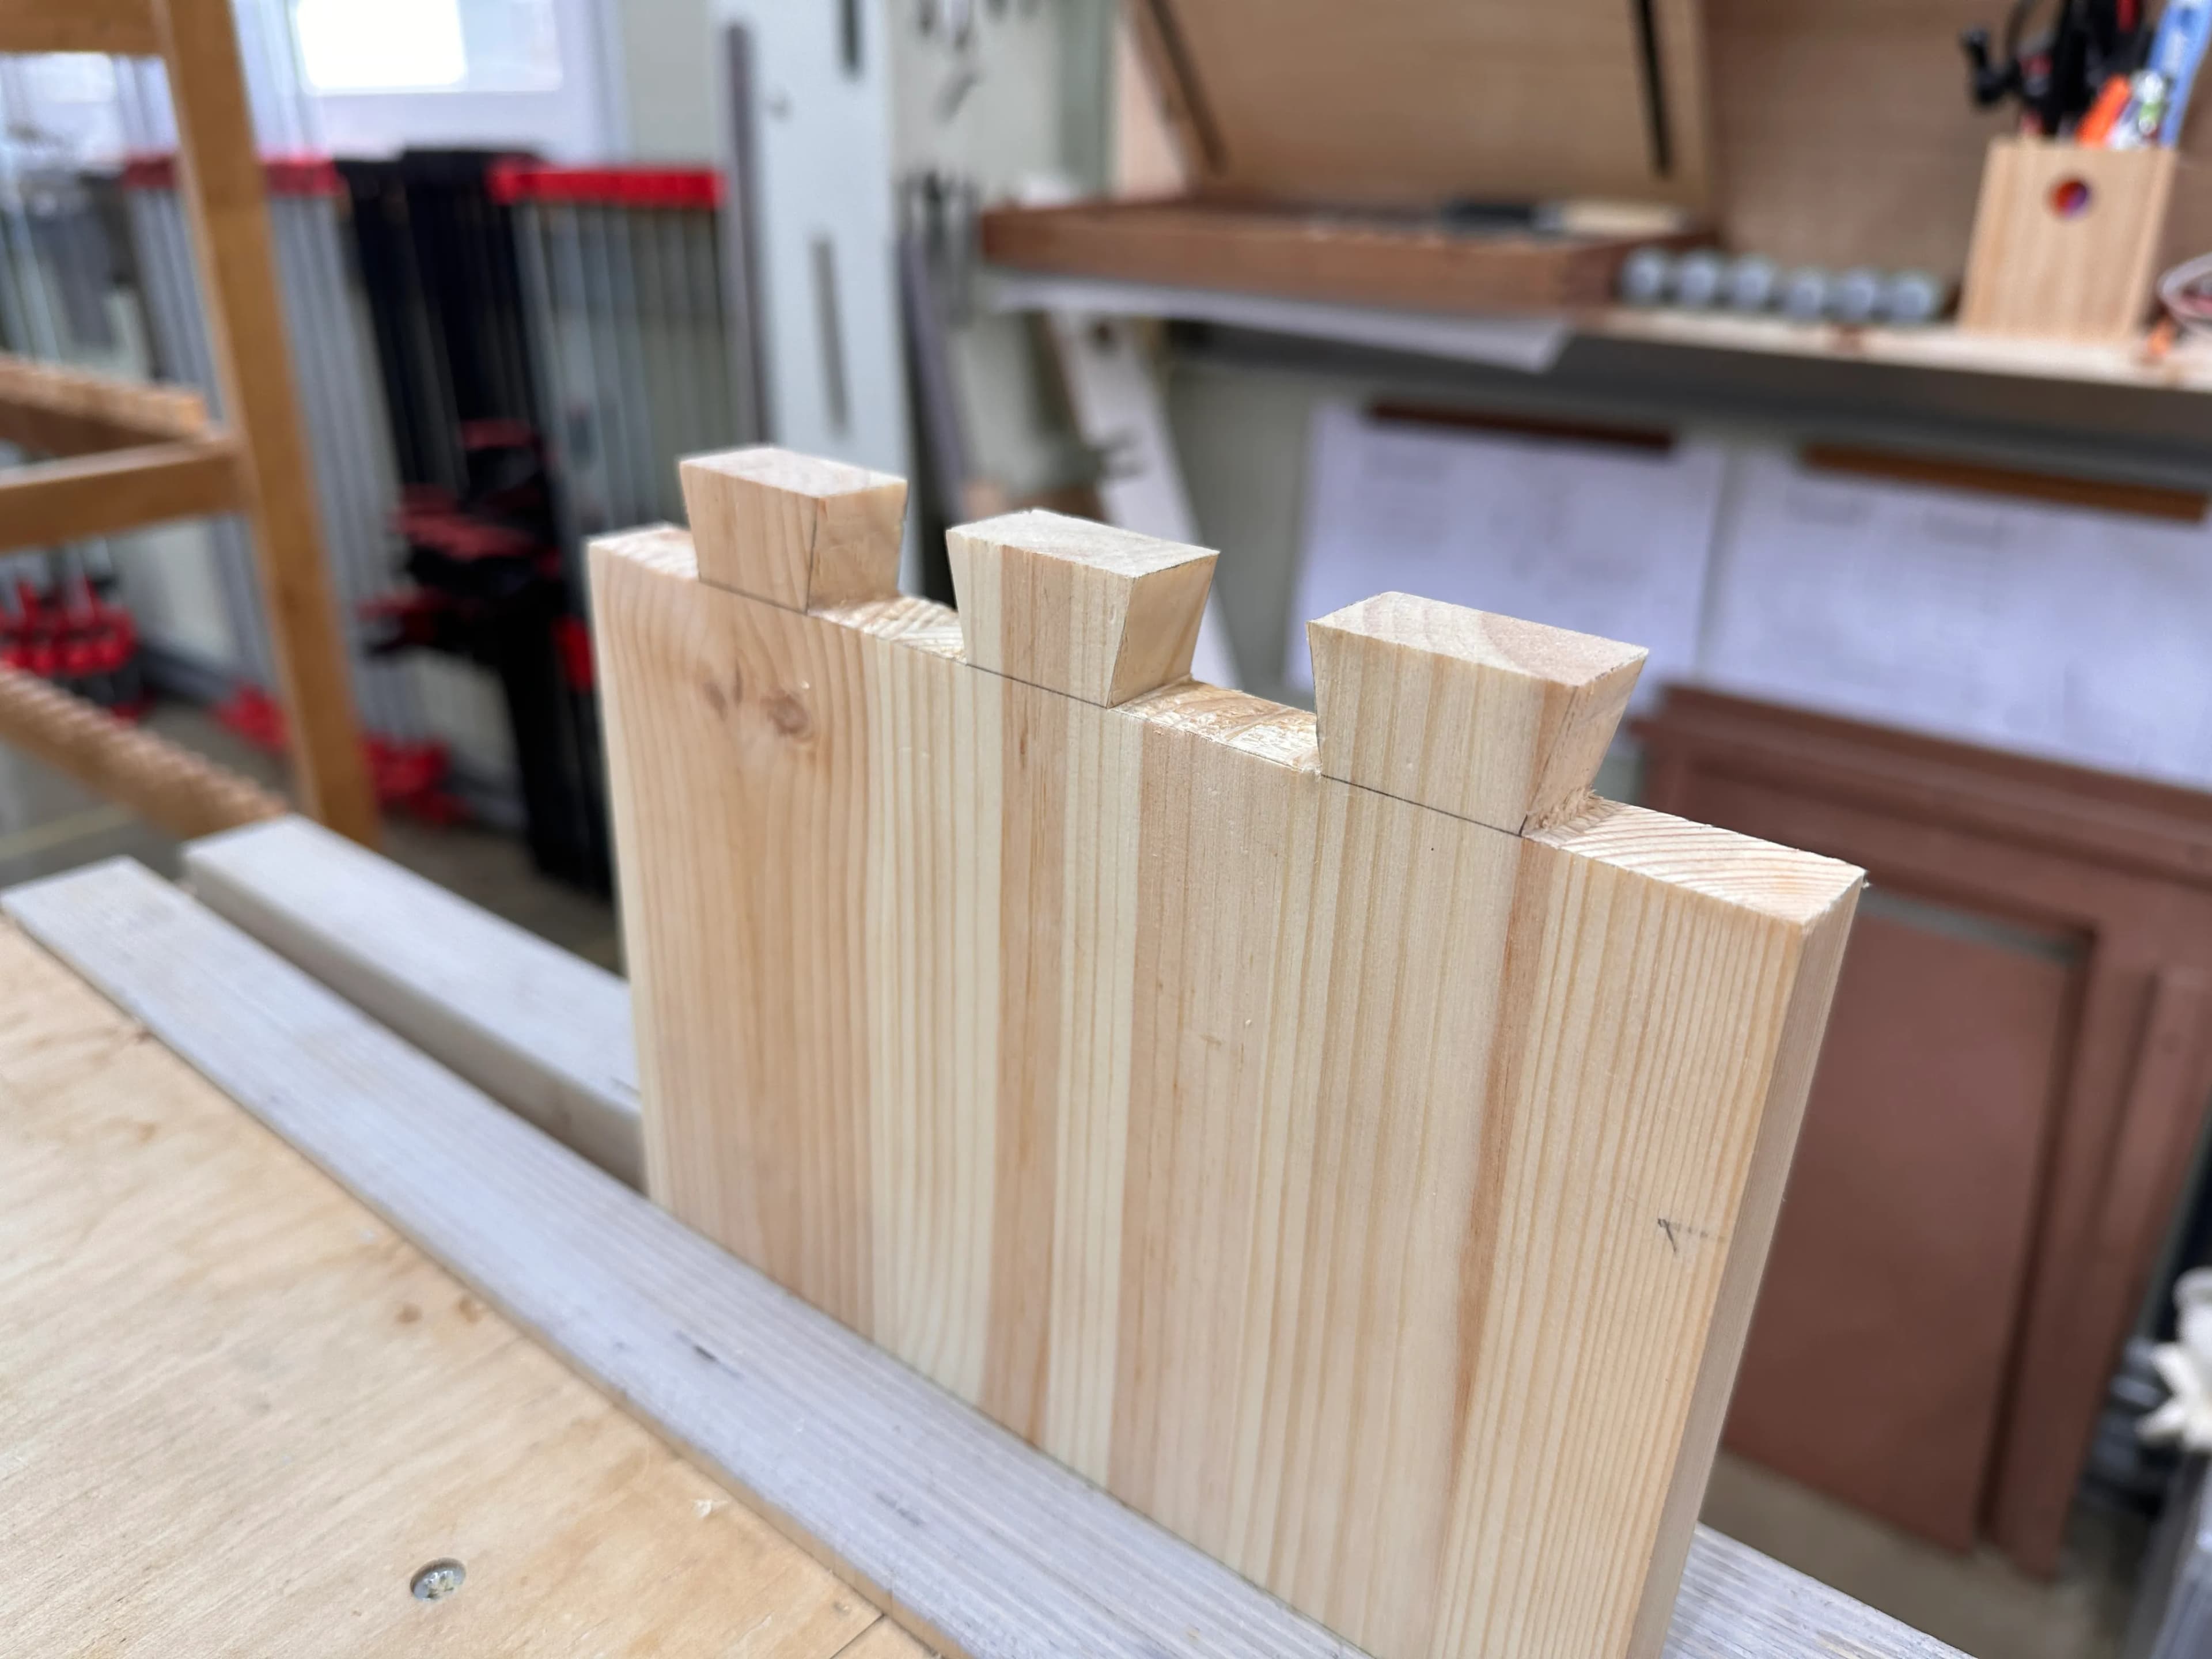
Mark the waste areas with hatching, then cut with a saw. Saw as close to the line as possible so you don’t cut past it into the wood.
Use a chisel to pare down exactly to the lines you drew.
Male dovetail complete.
Making the female part isn’t much different from making the male part.
The difference is that you use the finished male part to draw the layout, and the interior waste to be removed is diagonal.
Then you do a trial fit of the two parts, apply glue, and clamp them.
3. Trying it myself
When I made dovetail joints with a chisel before, the wood fibers kept tearing out along the grain and leaving holes.
Turns out it was because the chisel hadn’t been properly sharpened.
This time I bought an inexpensive chisel on AliExpress, sharpened it up to 8000 grit, and brought it with me.
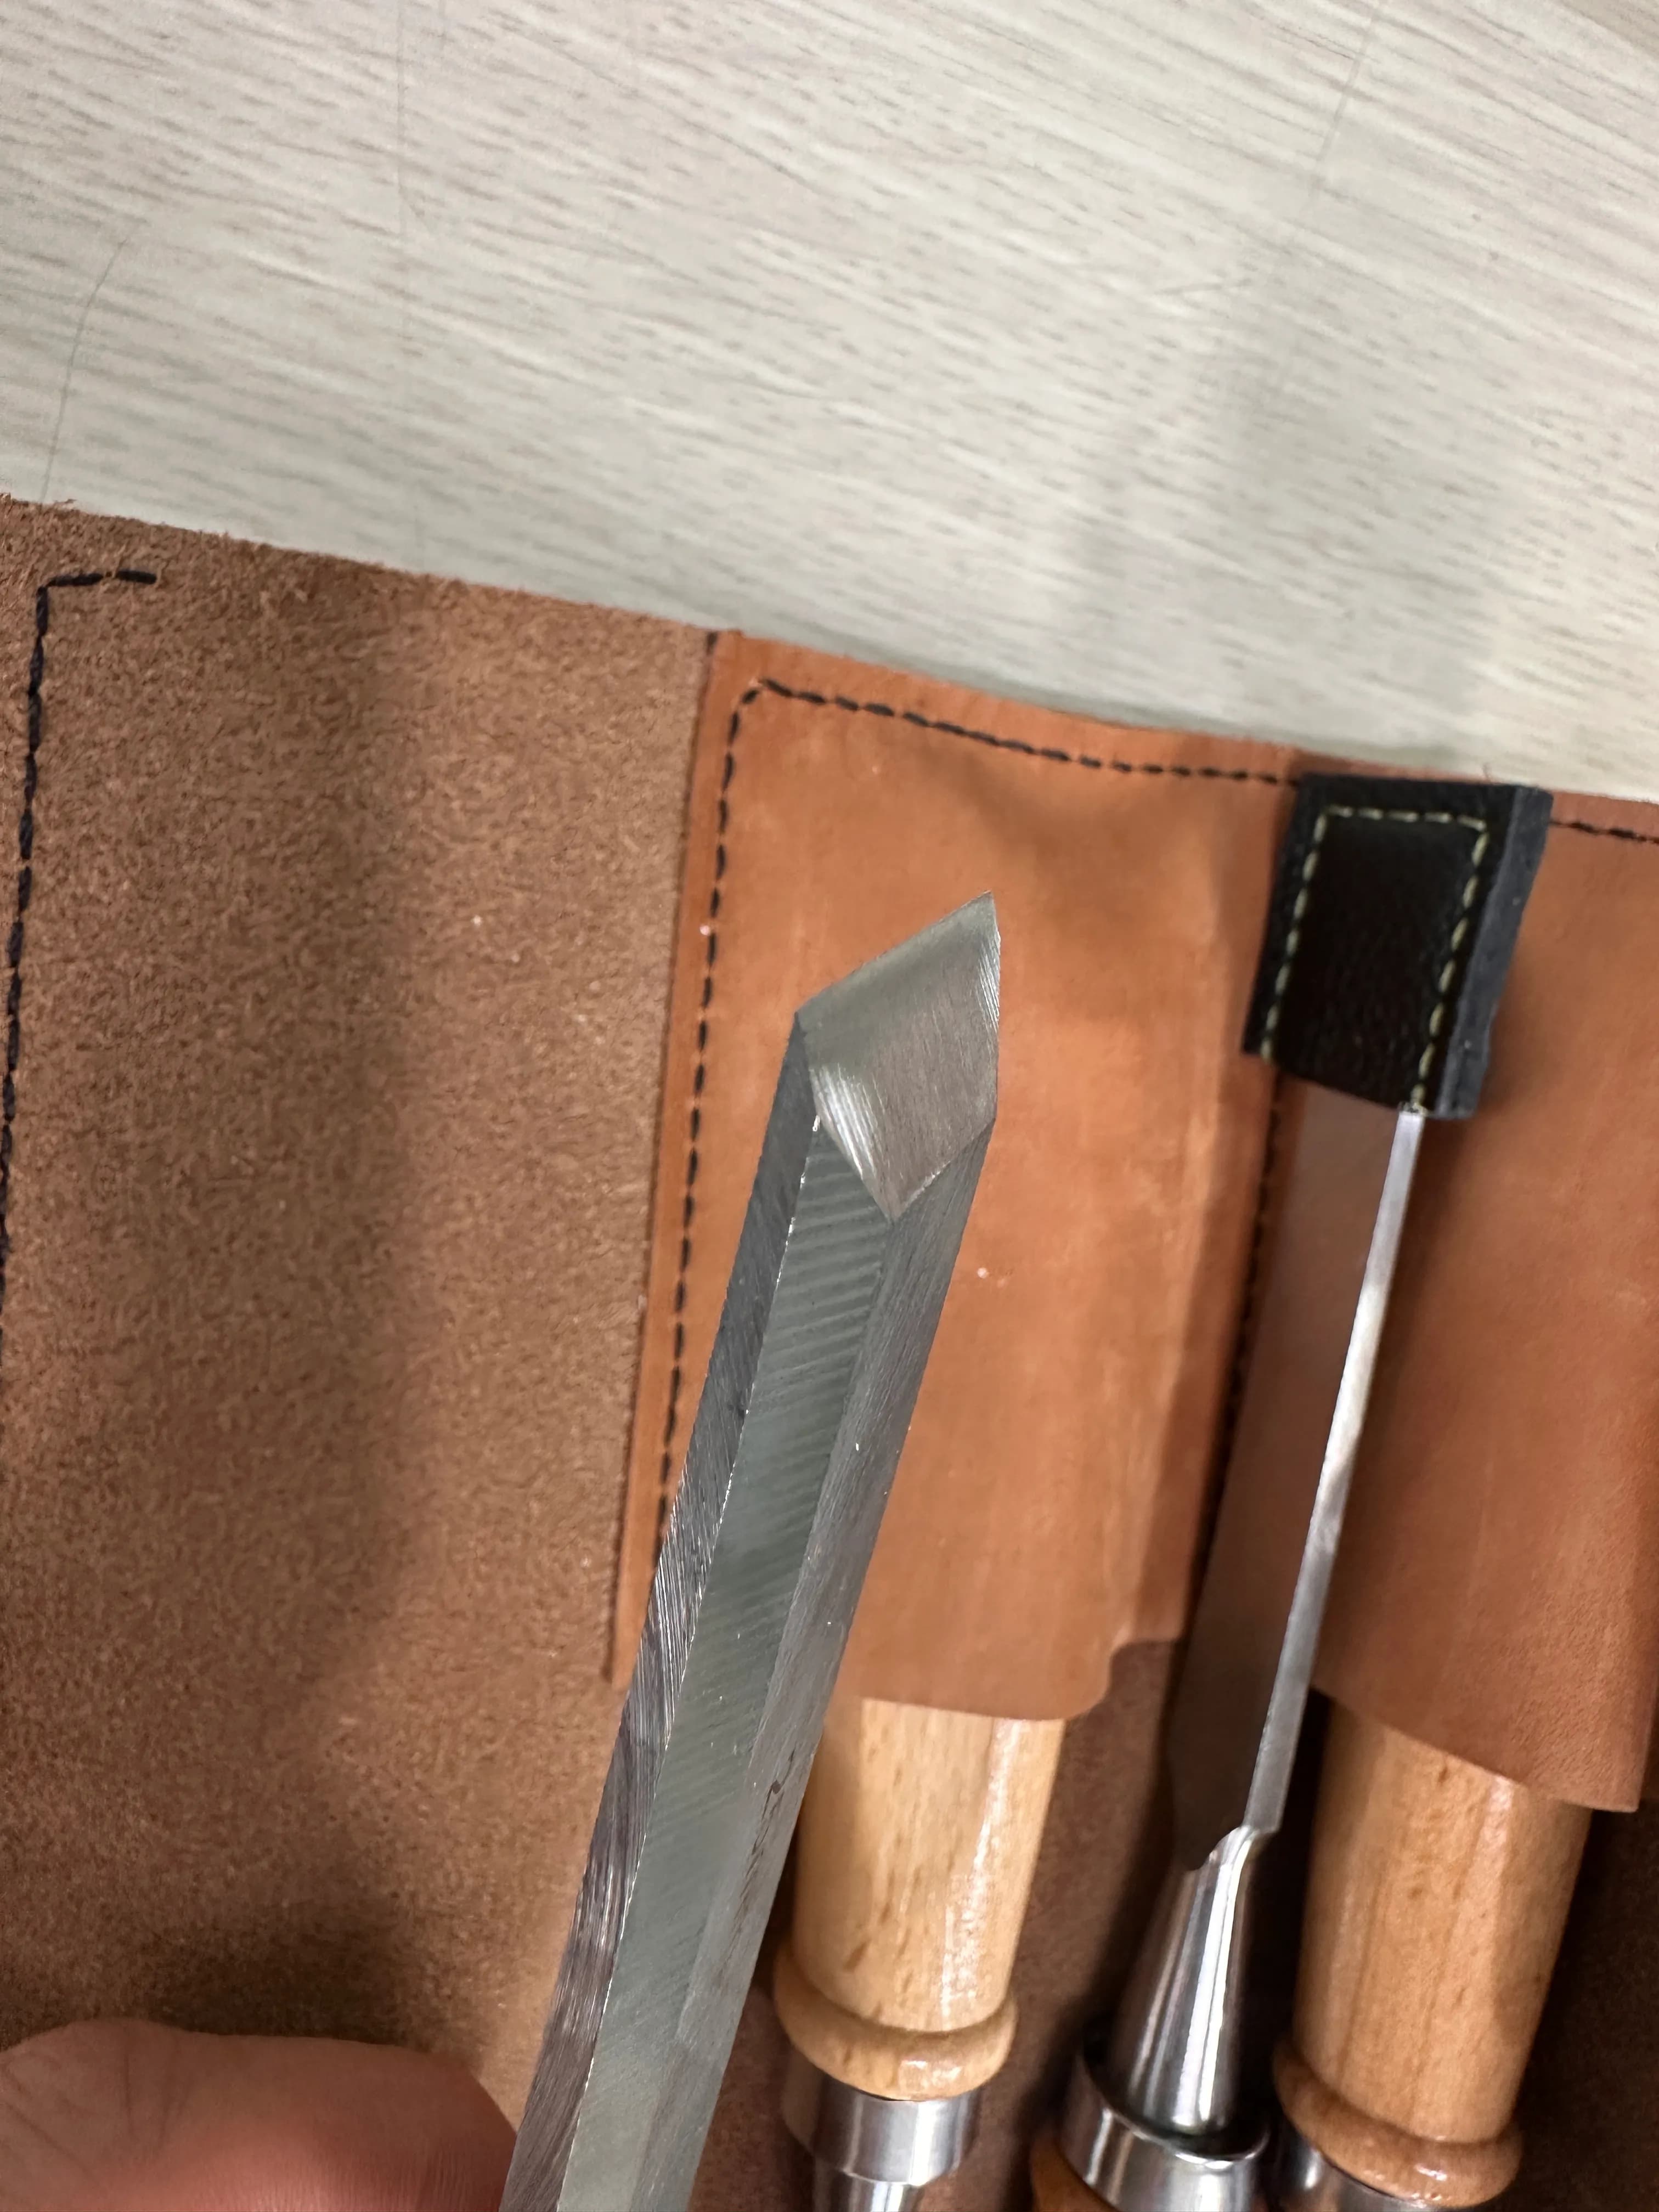
It’s not exactly a high-end tool, but after putting in the work sharpening it, it became reasonably sharp.
I carefully laid out the dovetails and then pared them.
When the wood is too dry and the fibers tear out in big chunks, I was told to lightly spray water or alcohol.
When you spray water or alcohol, the fibers toughen up a bit and the surface finish comes out nicer.
4. Impressions
When I tried dovetails before, they just felt difficult, but once I brought a properly sharpened chisel, the difficulty level dropped a lot.
When I used a file before to remove material, there was some bulging, but this set of dovetails came out clean with no bulging at all, which I was happy about.
I should practice more at home by making boxes.
댓글을 불러오는 중...